Reclaimed Wood Bar Height Farmhouse Table
Don't forget to stop by and Like my Facebook Page and Follow me on Twitter!
 FINALLY finished! I started this project back in the spring and it's finally wrapping up. I decided I wanted a new kitchen table with two features: 1. it needed to be bar height with a storage shelf below and 2. the top needed to be removable. Without further ado check out our new Farmhouse Table!!!
It all started with this pergola. Remember my Salvaging Pergola Wood post from last year. Well I wanted to put that wood to use. In April I drew up a sketch of the table and started planning.
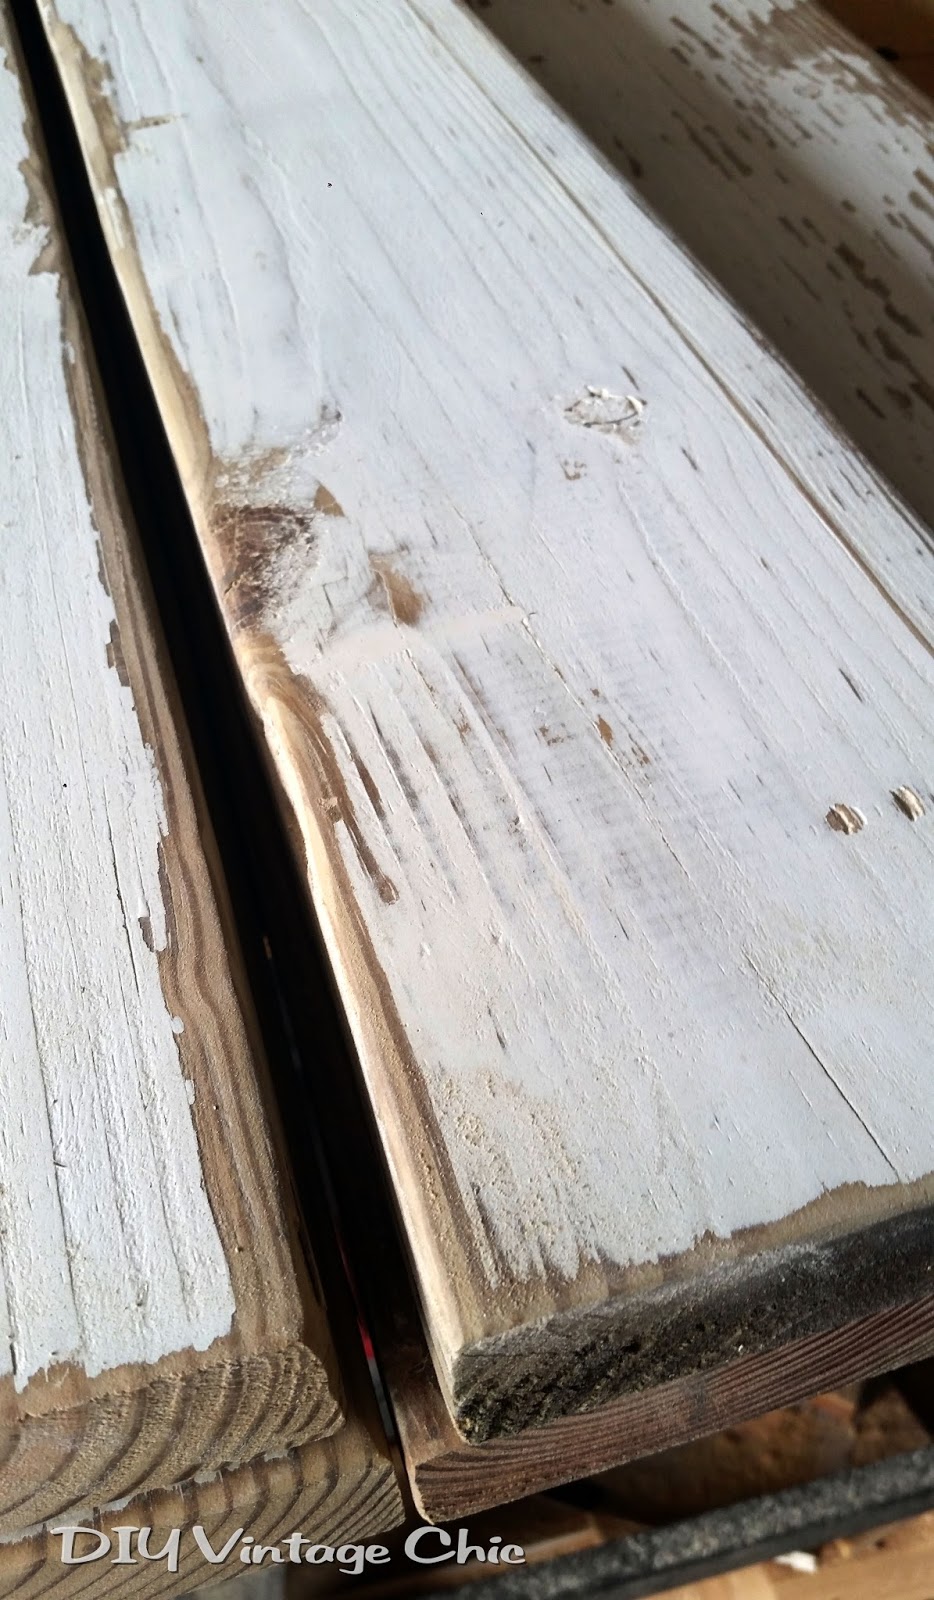
 In May I was finally ready to start but the wood was definitely covered in mold and mildew. And the paint was chipping or completely gone.
 Time to get busy sanding. The worst part {in my opinion} of a DIY project. So that's what I did. Sand, sand, sand....
 ... all without a mask {I'm a big dumb dumb}. By the end of May I was coughing so bad my doc sent me to get x-rays of my lungs. Luckily nothing too terrible but it did take a few weeks for it to clear up.
 I spent part of June recovering, one week trying to make it to the store for a respirator and the other part of June building up some courage to continue with the project.
 And so the sanding continued. I started with a belt sander and used about a 80 grit. This helped removed most of the mildew and chipping paint, exposing new wood but surprisingly leaving quite a bit of paint to have a nice vintage texture. I switched to the palm sander and 120 grit. And finally to 220 for a nice smooth finish.
 I begin building the tabletop. Cut the boards to size {the table measures about 50x50 inches} and started arranging the boards. They are all a little wonky {technical term} so I tried to pick the straightest, flattest boards out of the bunch. I don't have a planer and I didn't want to use one but I didn't want a wobbly table either. For the most part I was able to arrange all the boards so there were very few cracks between boards.
 I decided to add breadboards to the side. Adding these 2 boards gave the table a more finished look.
 Next up, adding a little bit of stain to the boards. Now quite honestly I stained a few boards and started to freak. After months of staring at the fresh, new wood I thought this dark stain {Jacobean} was way too much. Luckily I've got some great friends {thanks Shannon and Clayton} who are artistic themselves and have a great eye. They came over and assured me the stain looked great.
 Since we're in the middle of our kitchen remodel I wanted to see what our future new floor {bottom of photo below} would look like next to the stained wood of the table. While I was at it I grabbed my Custom Placemats I made a few years ago. I already had an idea in my head for the table legs but this confirmed what I should do. Stayed tuned: discussed later in this post.
 Time to put the table top together. I lined all the boards back up. To help keep the boards in order from my previous arrangement I had numbered them. This made it much easier to put back together after staining.
 I bought this fun, new clamp and used pocket screws to attach the boards together. I drilled a pocket hole about every foot or so.
 Once the tabletop was put together I grabbed the breadboards. I had cut them a little long initially just in case. Measured the table top and cut off the extra from the breadboards.
 I attached them the same way, using pocket screws. Here's a pic of my GC, Matilda. She's supervising. I think this was a look of approval.
 Or perhaps she thought it was a bed for her. To add some support I added this frame to the backside of the table. And that completes the tabletop.
 Next up, the bottom shelf. I created this shelf using the same process as the top. Lined up the boards and attached them.
 I have a frame on the bottom for support with this as well. A finished it up by sanding the edges slightly and hitting it with a little bit of stain.
 I had decided early on in my planning that I wanted the tabletop to be removable. Also after staining the tabletop and comparing it to the new flooring I determined that I wanted the legs to be white. I painted them with a fresh coat of white and sanded the edges slightly for a distressed look. Here I'm trying to plan out the legs position, the shelf and the support beams.
 The support beams {the two boards set within the tabletop frame and below the table legs in the picture above} are attached to the each leg with three 3-inch screws.
 In order to make the top removable but without stripping the wood by taking the screws in and out, I purchased wood inserts from the hardware store. Using the recommended bit I drilled through the support beams and into the tabletop at the recommended depth. {I measured up my drill bit the recommended depth and tapped off the line. Once my tape reached the board I knew the drill had gone in far enough.}
 Once the holes are drilled the inserts are screwed into the wood using an Allen wrench {hex key}. To ensure the inserts were secure I ran a little bit of epoxy around the outside of the inserts before screwing them into place.
 I purchase bolts in a matching size and was ready to screw the bolts into the support beam and further into the tabletop.
 Now the hard part, attaching the shelf... at the right height... while keeping it level... Luckily the hubby was home for this part and with 4 hands instead of two we completed the task.
 And we're ready to go, right? Well... I felt like the table needed a little more support.
 I attached 2 more pieces with pocket screws between the support beams and tried again.
 Perfect! Ready for the tabletop. To finish the tabletop I ran the sander back over one last time using 320 grit. The finest of fine. And then delicately painted on several layers of polyurethane giving each layer plenty of time to dry and sanding when needed.
 The GC is back for final inspection. I moved a few barstools to the table however I don't plan to use these. One, I don't like the way they look with the table but we also only have 2.
 I made the sides wide enough that we should be able to seat six. Eight might be a stretch but I think it could happen if we don't put any food on the table.
 I'll be the first to say the pink flowers are not my first choice and I'm also SOOOO ready for a new paint color.
 On the shelf I added a bowl of wine corks. I thought about getting creative by adding a bottle holder to the shelf {easy access} but maybe another day.
 Check out that texture! I look back at some of the earliest pictures and I'm thrilled with how the wood turned out. Not without a little sweat, pain and tears AND lots of coughing. And I won't discuss the doctor bills. WEAR A RESPIRATOR!
 I've been curious what the table will look like once our remodel is complete so I quickly {my graphic design teachers will cringe} did a Photoshop job, changing the wall color and adding in a dark "floor". Looking good! I might even start to like the pink flowers.
 Stay tuned for more remodel posts and an update on the barstools!
Thanks for stopping by!

Check out who I've linked up with this week by going to my Linky Party Page!

It all started with this pergola. Remember my Salvaging Pergola Wood post from last year. Well I wanted to put that wood to use. In April I drew up a sketch of the table and started planning.


Thanks for stopping by!

Check out who I've linked up with this week by going to my Linky Party Page!
***While I'm thrilled to share my step-by-step directions, the good and the bad, these are intended for your personal use. I'm always happy to hear and see what my bloggers have been working on. BUT a lot of work goes into these creations and while I have no issues sharing so you are able to create the work for your precious homes please understand that selling an exact duplication of my designs is highly frowned upon. :( Please always be considerate of another artists work. Thank you!***


I was very interested in how you attached the legs to the tabletop. How did you ensure that the legs would be exactly perpendicular to the top? and parallel to each other? It seems like even the slightest flaw in cutting the leg lengths would cause a problem. I'm planning my own table and have these concerns.
ReplyDeleteYes, attaching the legs was tough since I was using reclaimed wood. The 4x4s I used were all a little different and warped. And because I positioned my legs so far inside (rather than at the corners of the table top) I also had some concerns about stability. The best advice I can give is to make sure the legs are all cut to the same length and then secure them using aprons at the top and/or some stability at the bottom (like the shelf).
DeleteHonestly if I were to make a 2nd table I would probably purchase new boards for the legs or find a friend with a planer so I could make sure the boards are all the same.
Hope that helps!
Love your table and will be trying to copy very soon.
ReplyDeleteThis comment has been removed by a blog administrator.
ReplyDelete