Colorful Moth Embroidery on Wood
Don't forget to stop by and Like my Facebook Page and Follow me on Twitter!
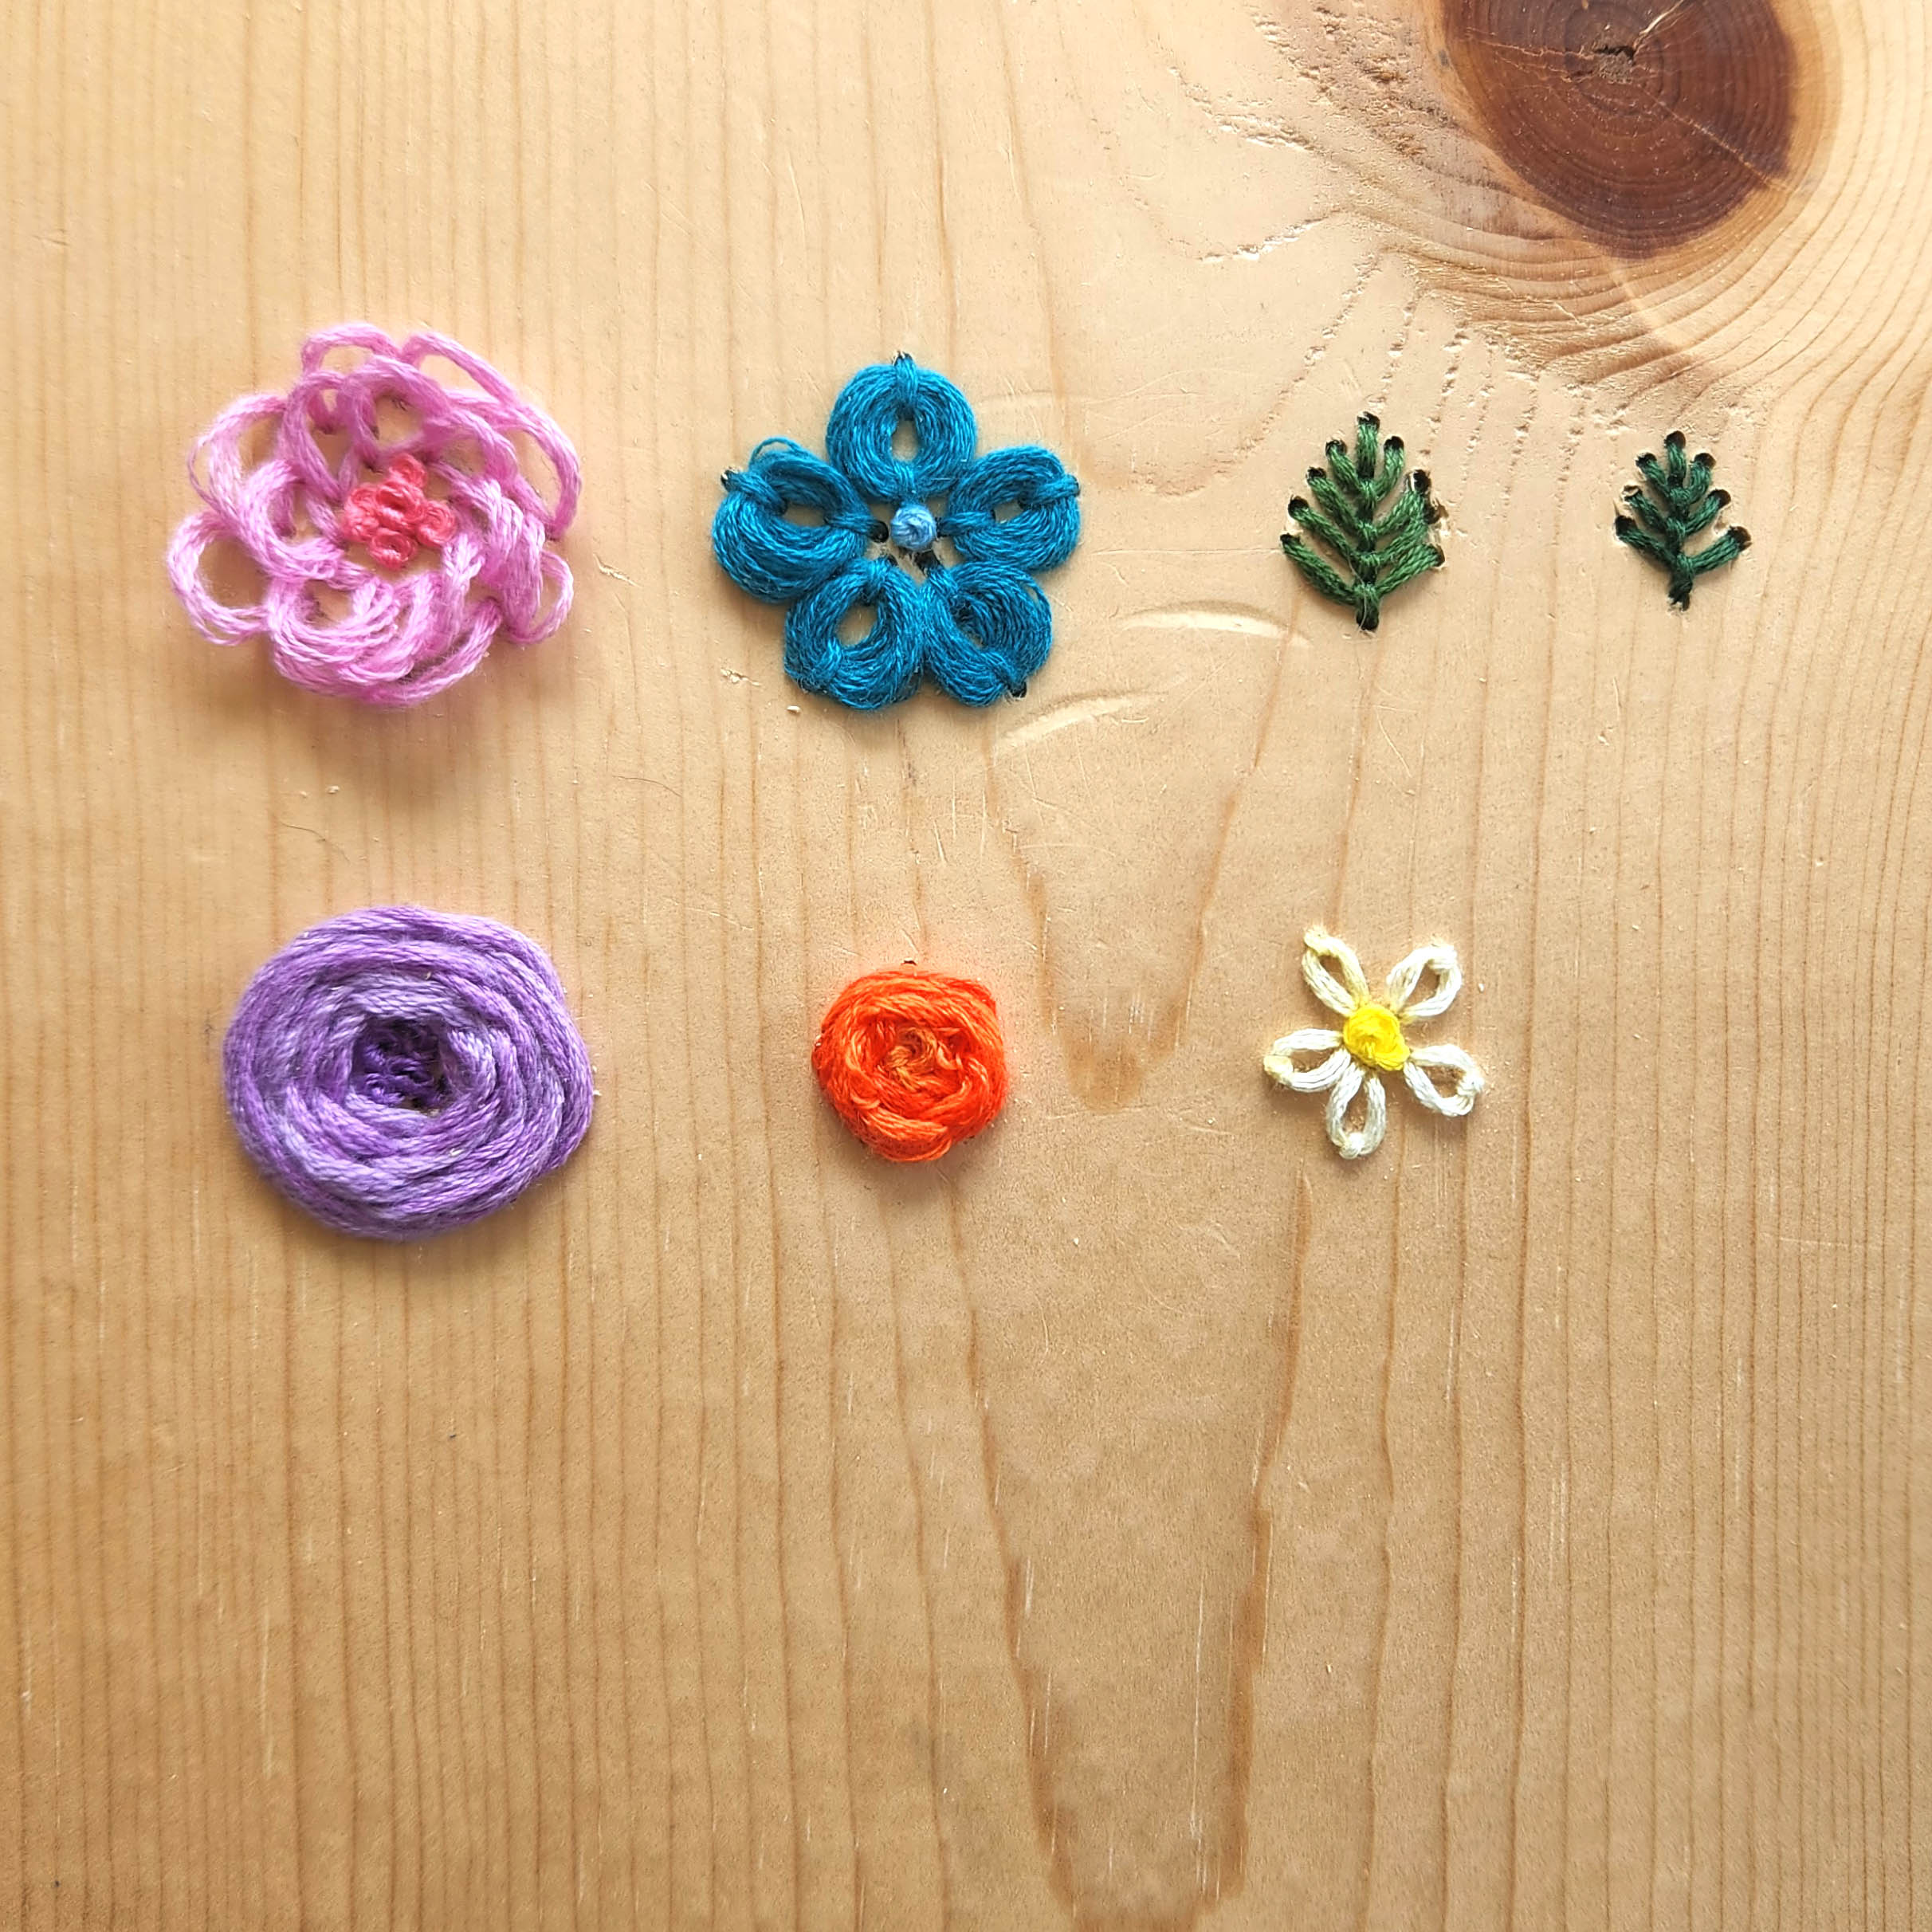


I moved on to a small and fairly easy flower using the Woven Wheel Stitch {flower} and Fly Stitch {leaf}.
 The second flower uses Woven Oval and French Knots for the center of the flower.
 The largest flower was the most difficult. I used various shades of pink thread. The struggle was keeping the loops a similar size. The Fly Stitch was used again for the two leaves.
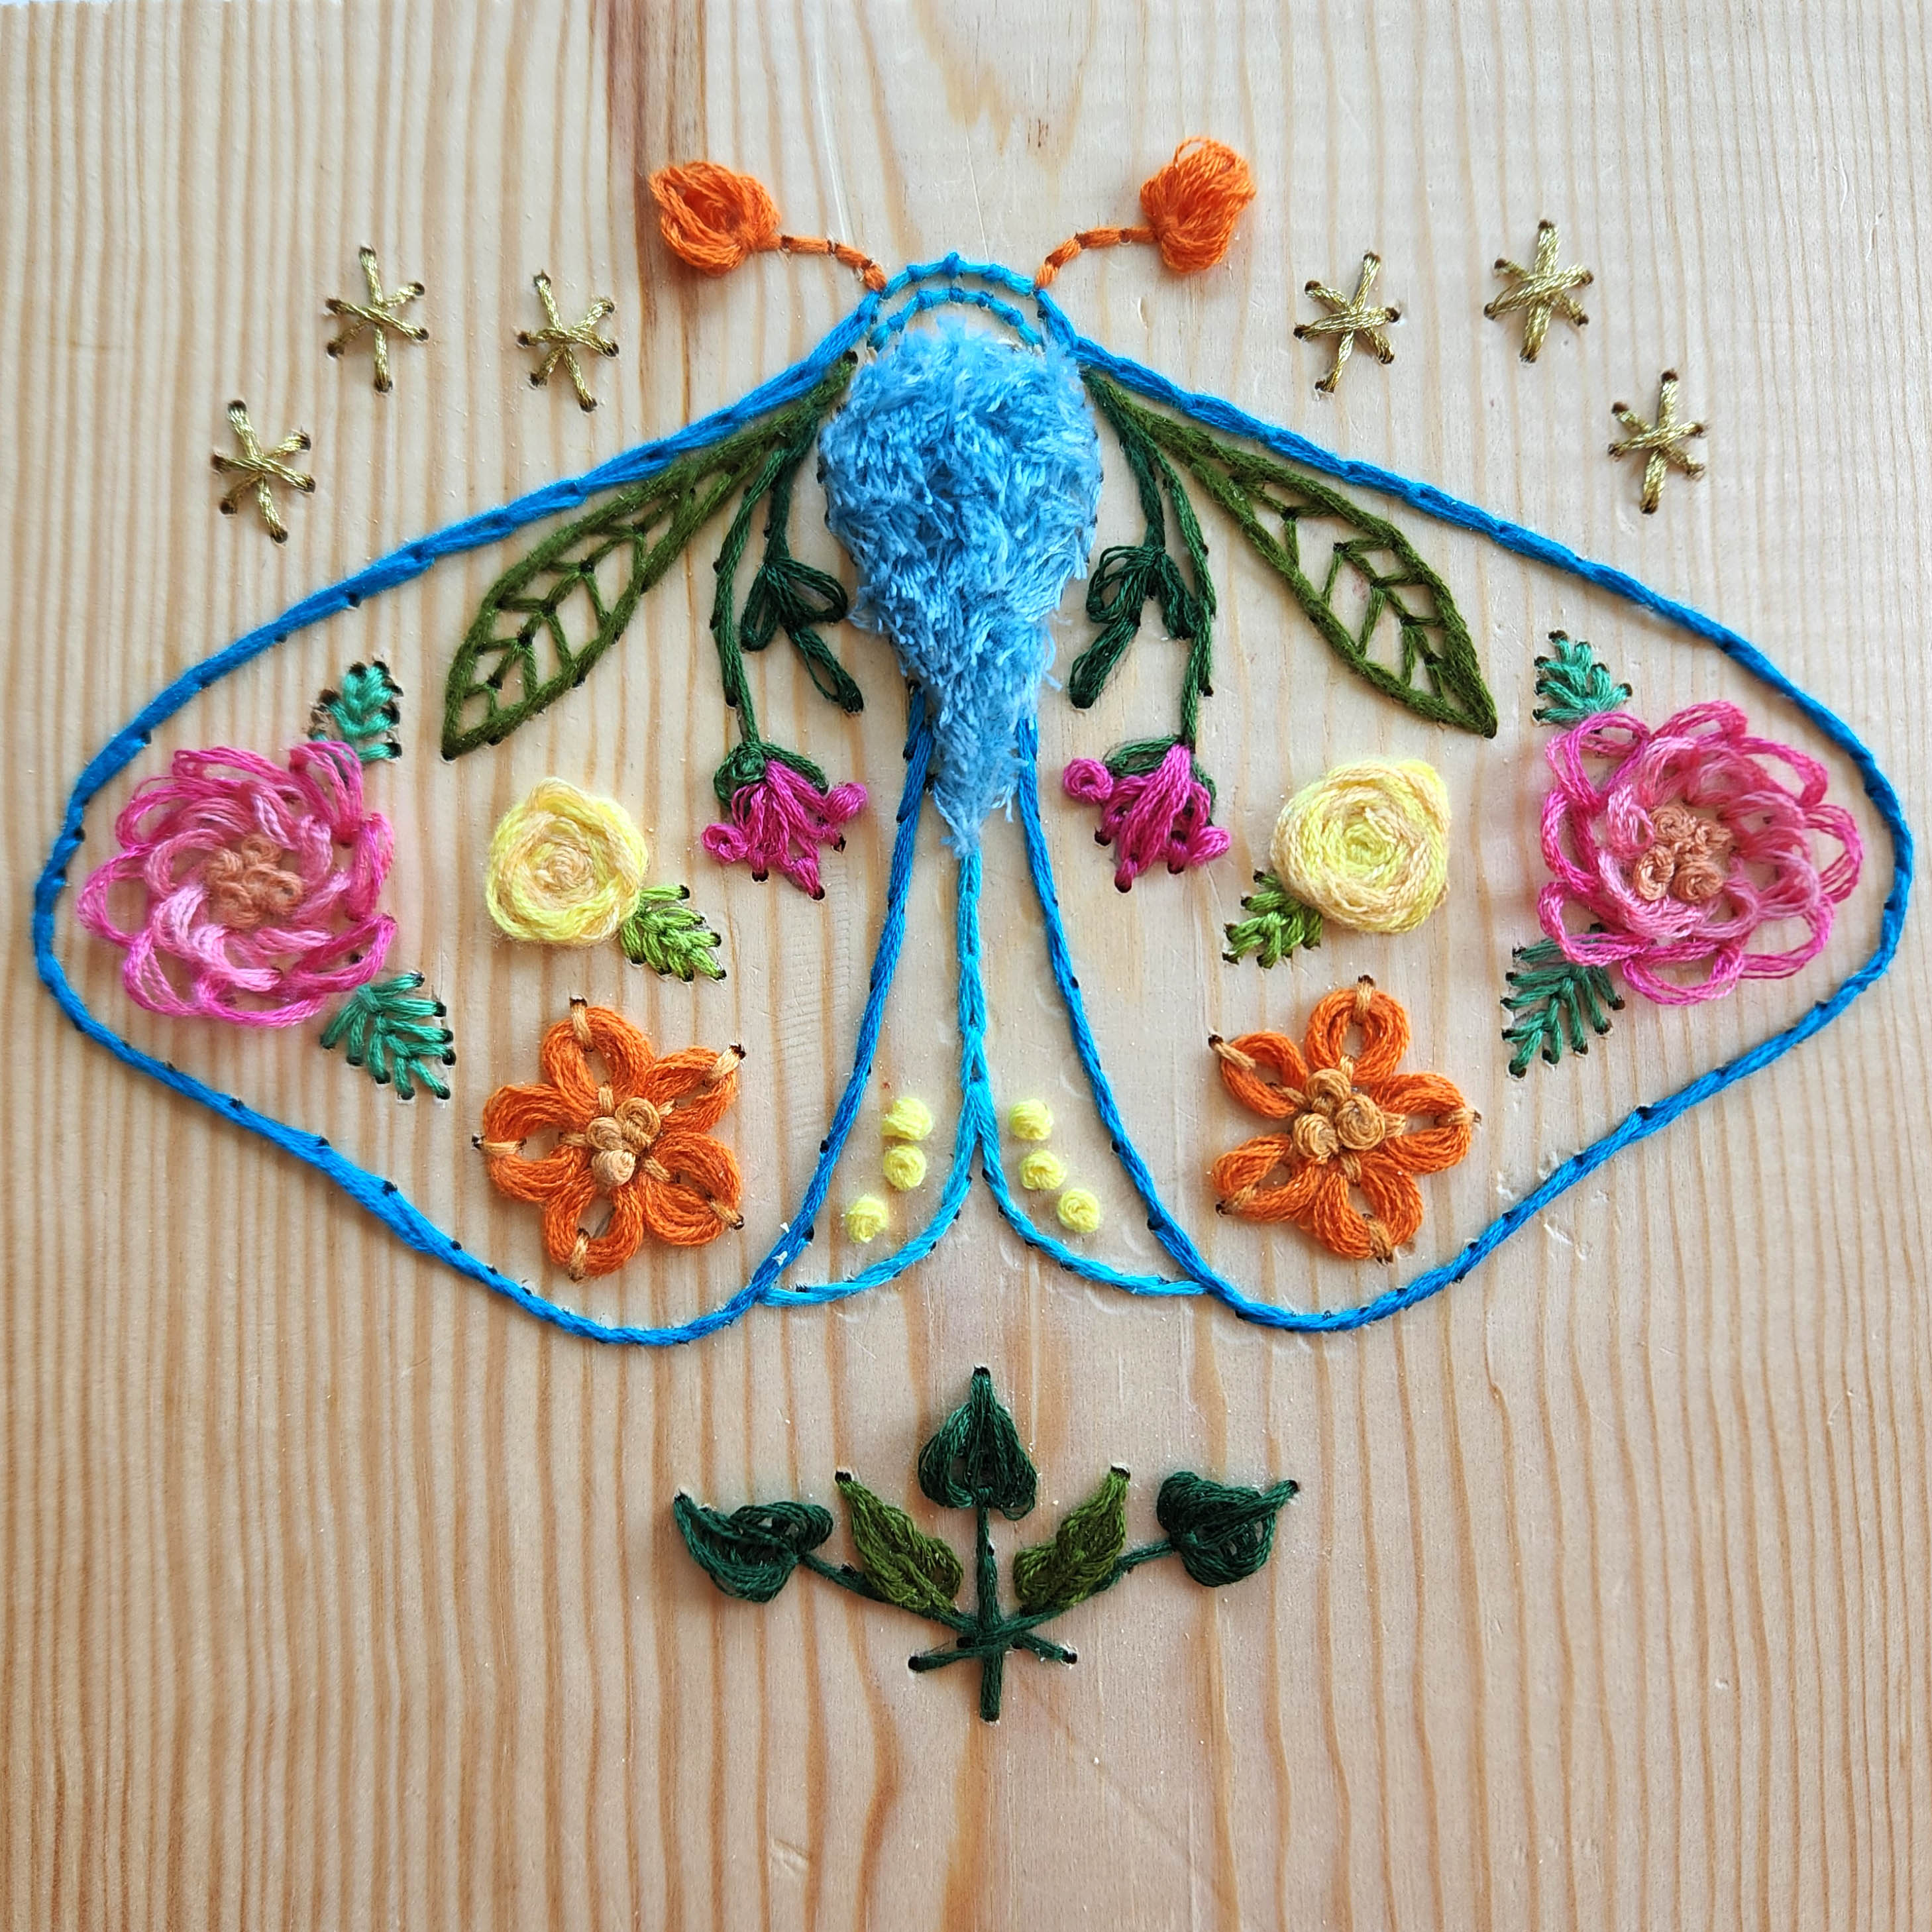
 I used a combination of the Stem Stitch, Couching Stitch and Chain Stitch to create the outline of the moth.
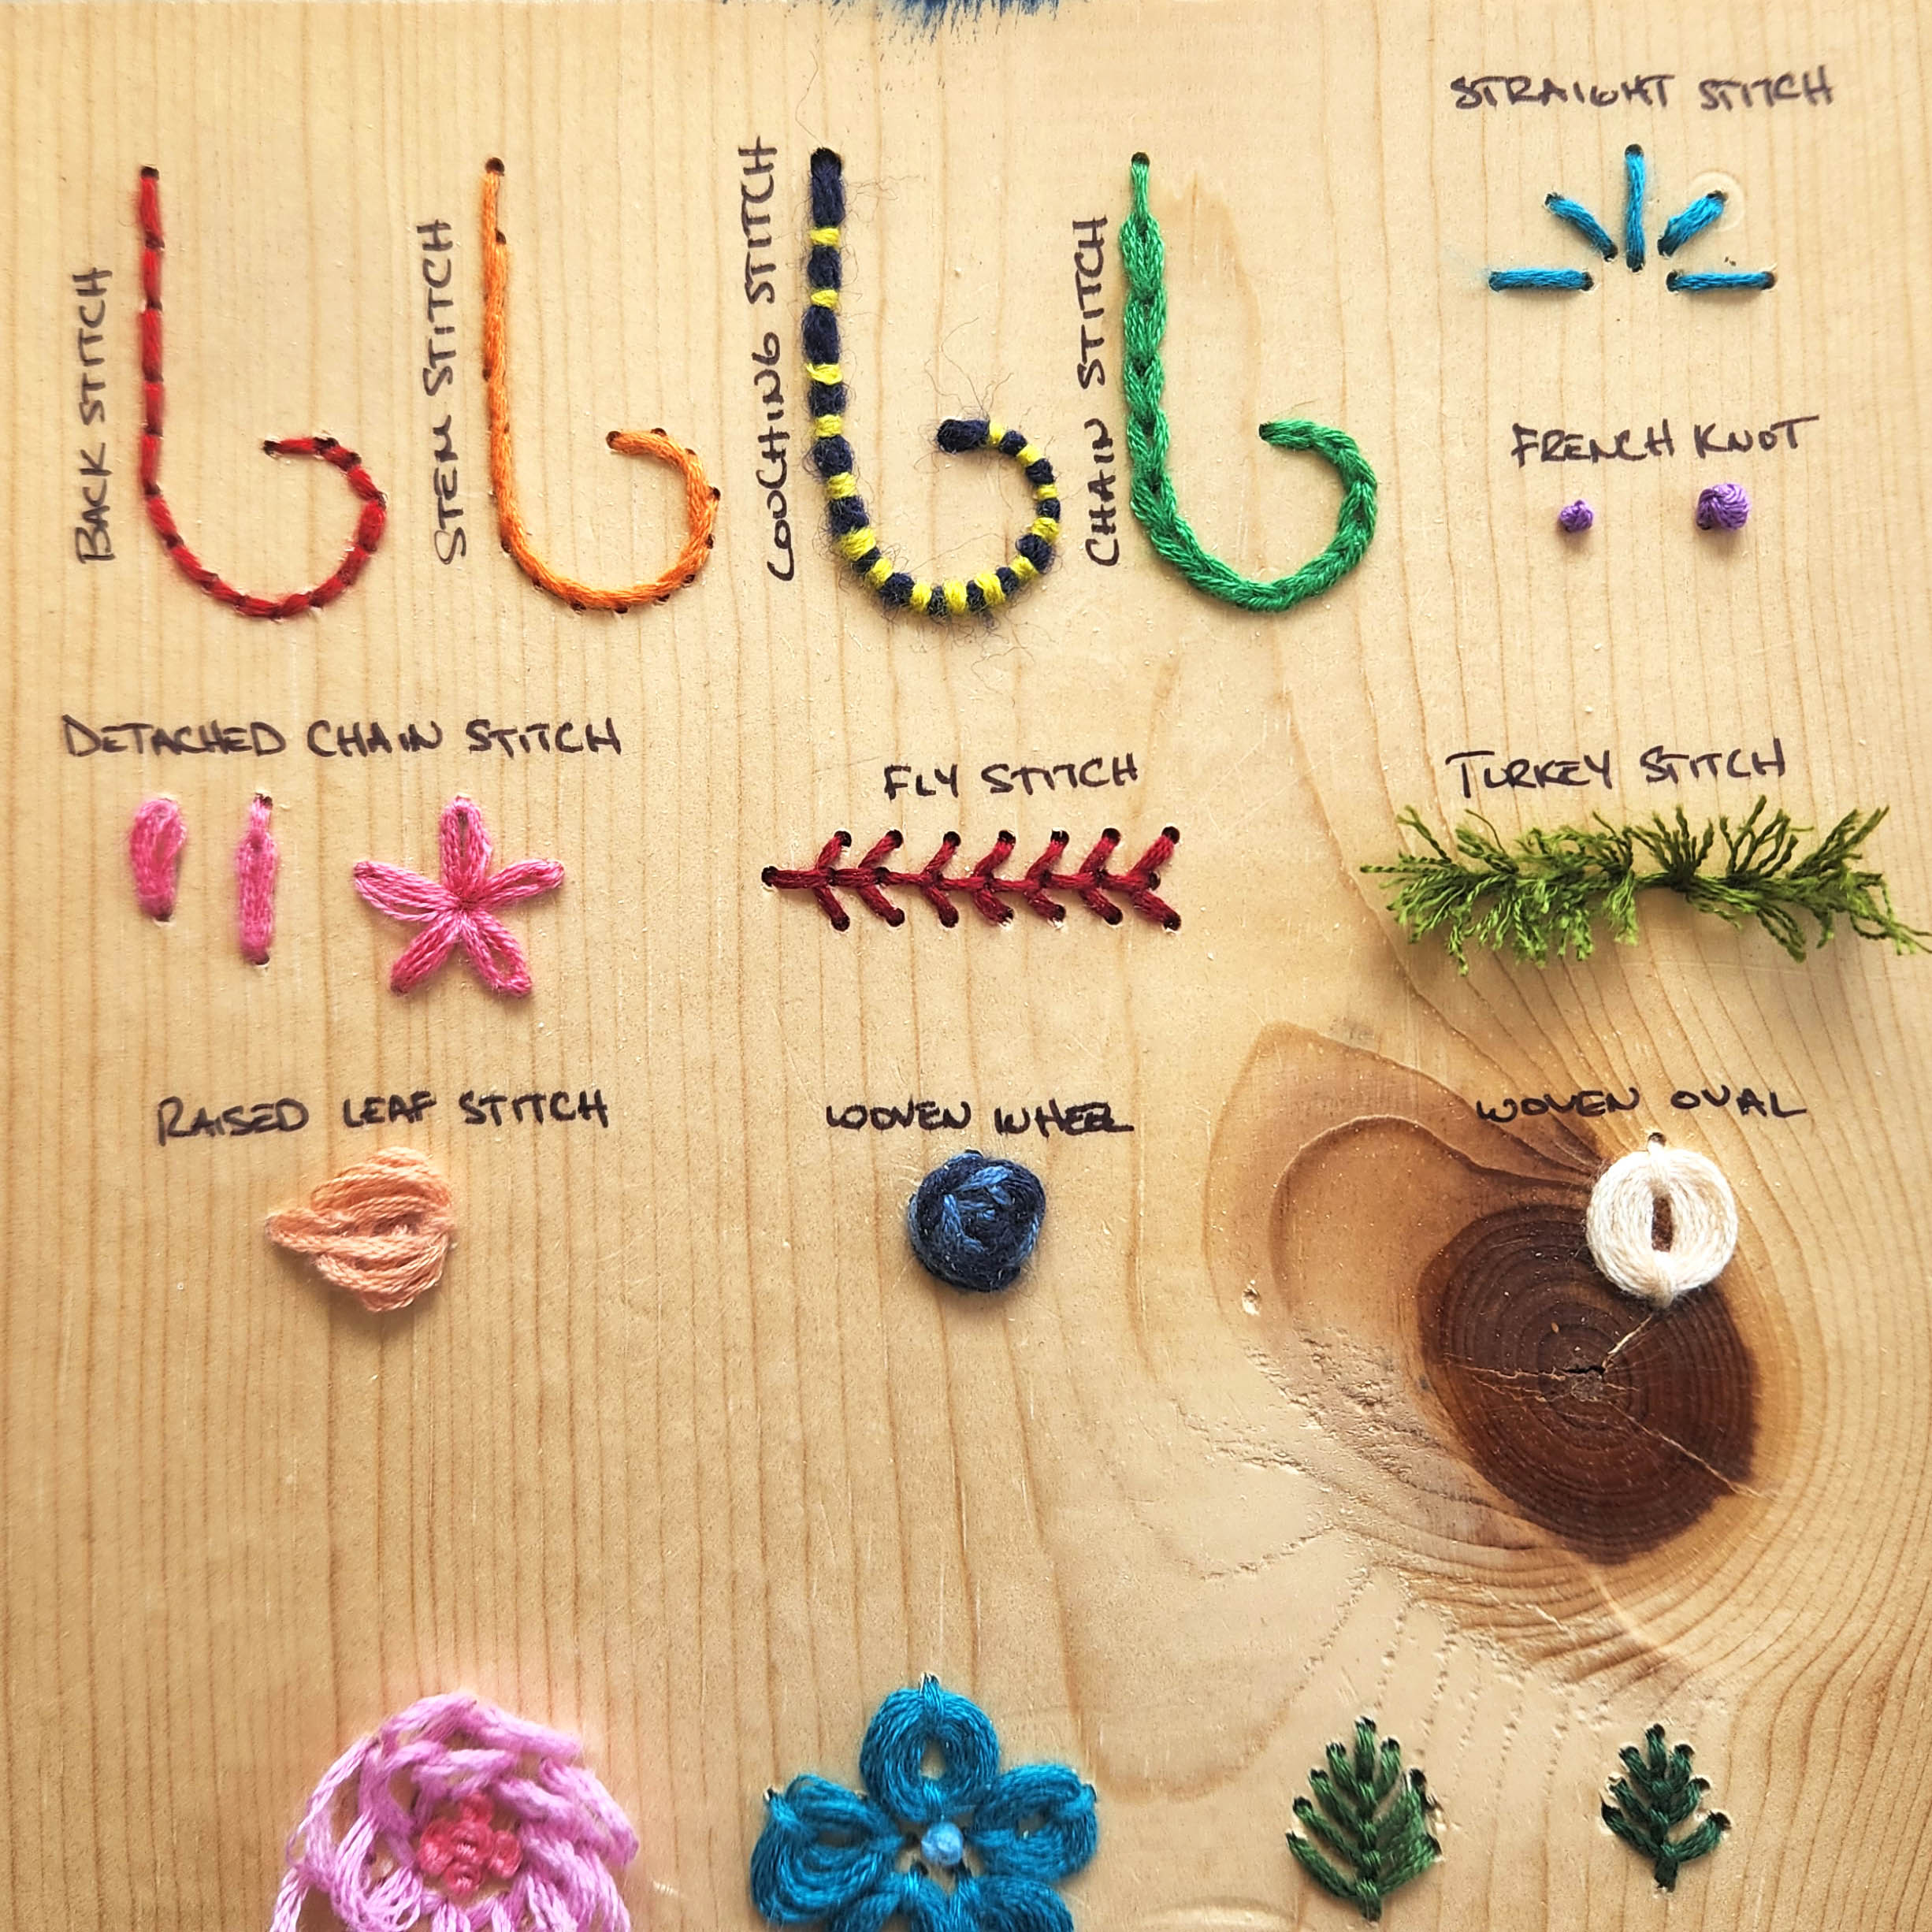
 The antennas were made from Back Stitch and Raised Leaf Stitch.
 Using various shades of green, I completed the elements around the moth's body being careful not to mess up the Turkey Stitch of the body. A combination of Stem Stitch, Back Stitch and Detached Chain Stitch were used. And last but not least, the decorative elements around the top {Straight Stitch} and bottom of the moth {Stem Stitch and Raised Leaf Stitch}.
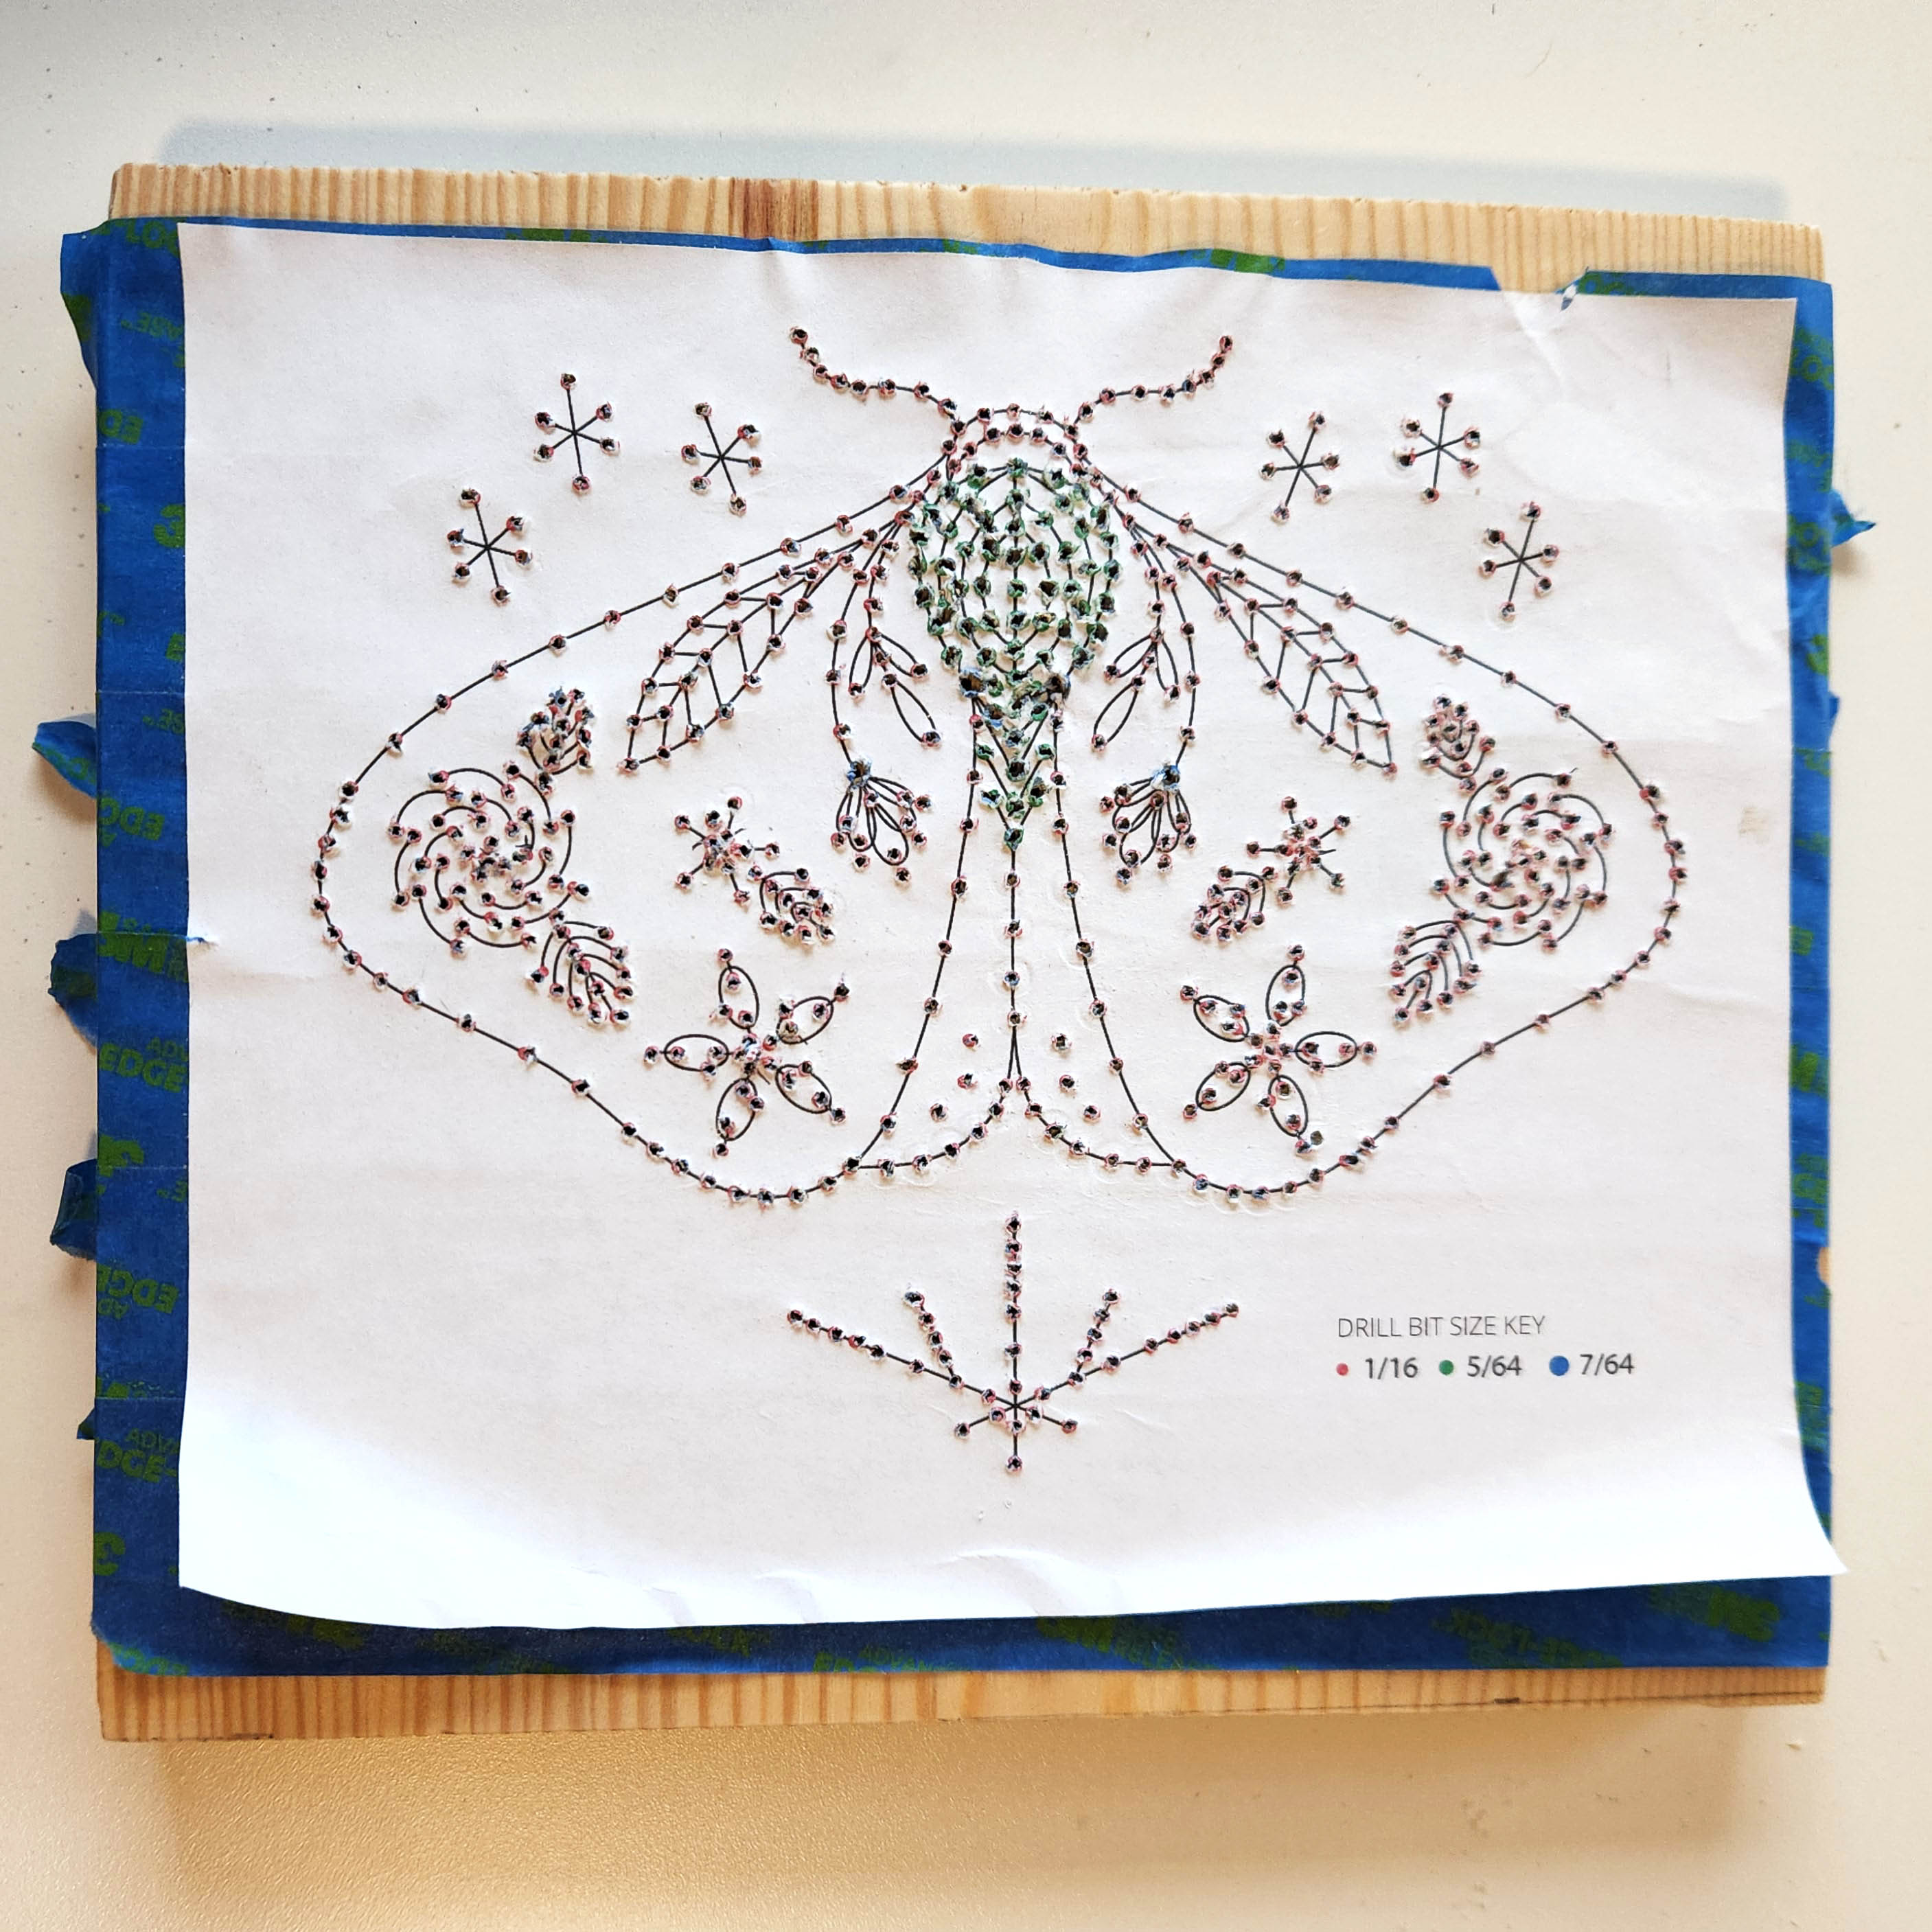
 I'm loving the texture of this pattern! Still working on creating a few patterns of my own. Designing a pattern, and therefore each hole is going to be harder than the actual embroidery work. Fabric is a little more forgiving when it comes to where you put the needle but it will take a lot of planning with a piece of wood. For now though, happy with the outcome of my first piece.
 Things I Learned:


Thanks for stopping by!
Becca


~ Buy the multipack of drill bits. I broke a bunch. :(
~ I apparently have dainty wrists and after drilling 579 holes {yes, I counted} my wrist was sore
~ I thought the worst part about embroidery was pricking myself with the needle but now I have to worry about the needle AND all the splinters.


Stay tuned for my next Needle Painting project.
Thanks for stopping by!
Becca
***While I'm thrilled to share my step-by-step directions, the good and the bad, these are intended for your personal use. I'm always happy to hear and see what my bloggers have been working on. BUT a lot of work goes into these creations and while I have no issues sharing so you are able to create the work for your precious homes please understand that selling an exact duplication of my designs is highly frowned upon. :( Please always be considerate of another artists work. Thank you!***


I've read your article. Honestly, I've never read this type of informative and efficient article before. This article will help lots of beginners like me to build skills in embroidery. Love to read your incoming blogs too. Really appreciate your work and dedication.We have us digitizing to fulfill your embroidery needs.
ReplyDeleteThis article is a goldmine of useful information. I appreciate the depth of research you’ve put into this. Looking forward to reading more from you
ReplyDelete3d wooden world map
Pretty!
ReplyDeleteDecent work!
ReplyDeleteCreative
ReplyDeleteHelpful information for better embroidery results.
ReplyDeleteThis article is worth reading.
ReplyDelete